
If you’re keeping track of all your IP addresses from your environment in a really big and messy Excel file, you may want to consider switching to an IP address management tool. One such tool is phpipam, which is a web-based tool that allows you to store your IP addresses in a central database (a SQL database, to be specific). The reasons why that approach would be far superior to an Excel file are pretty clear – first of all no more emailing a million different copies of that Excel file. But it has other advantages as well, for example if your software development team wants to check the availability/reserve a new IP address, subnet or vlan from code, they can do it via the phpipam API without ever clicking on anything.
A testing instance of phpipam can be brought into your GNS3 environment quickly using Docker! It requires a little hacking, but nothing too ambitious. If you haven’t got GNS3 or Docker installed or you don’t know how to add a Docker image to GNS3, check out my post on that topic.
Topology
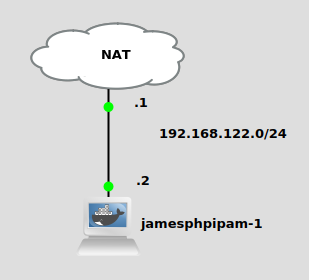
We’re not doing anything fancy here, just the phpipam docker container connected to the “NAT” cloud node. By default, the NAT cloud node uses a virtual adapter with IP subnet 192.168.122.0/24. The NAT adapter is at .1, and I’ll set my phpipam container to use .2. This setup will allow us to access the phpipam web server in the container at 192.168.122.2 via a web browser from our desktop computer that runs GNS3.
Build a custom docker image
We’re going to quickly build a custom docker image from the official phpipam image on Docker Hub. If you’re using a GNS3 VM, you can do this via a cli session on the VM. If you’re using Linux, just do this from any terminal. Make a directory for your Dockerfile:
mkdir jamesphpipam
vi Dockerfile
Now we’re going to write the docker commands for our custom image. MySQL server needs to be installed, and also the directory “/run/mysqld” needs to be created as well so MySQL can create a Unix socket there:
FROM phpipam/phpipam-www

RUN apk add mysql mysql-client
RUN mkdir /run/mysqld
Now we have an image (it’s based on Alpine Linux) ready to fire up in GNS3. You’ll need to add it from GNS3 preferences -> docker containers -> new. Go through all the screens and use defaults, except you’ll want to set the “start command” to “/bin/sh” to give you command line access when you double click on it from the GNS3 canvas.
Configure MySQL and Apache
First we need to open up the cli on the container and set its IP address to 192.168.122.2 (ip addr add 192.168.122.2/24 dev eth0). Start up both mysqld and httpd (MySQL Server and Apache Web Server), like this:
httpd
mysqld --user=root &
Make sure you use the ampersand at the end of your mysqld command, so it runs in the background.
To set the MySQL user and password, I had to login to the MySQL cli and run these commands in the phpipam docker container:
mysql -u root
ALTER USER 'root'@'localhost' IDENTIFIED BY 'SomeSecret';
Now we should be able to access the phpipam page at 192.168.122.2 from any web browser!
Configure new phpipam installation
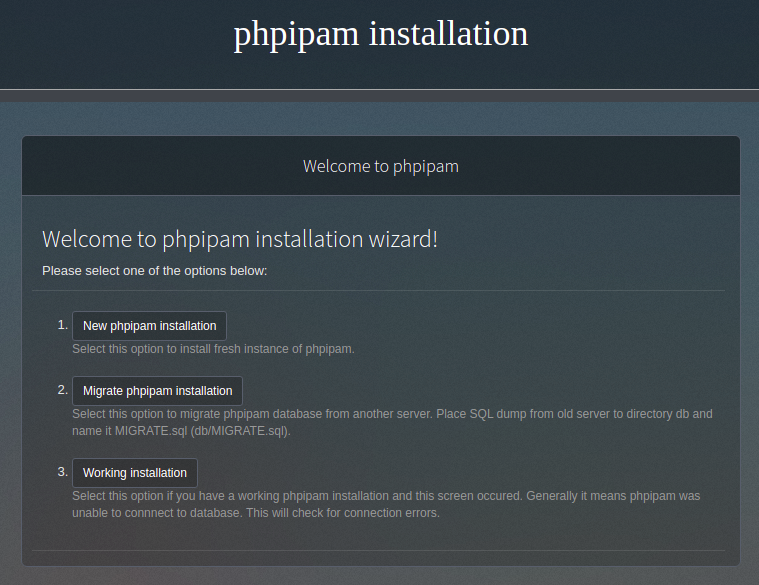
If you click on “New phpipam installation”, it will take you to a page to select the SQL database installation type:

Let’s select “Automatic database installation”. Then we just put in the user “root” and password “SomeSecret” that we entered in our mysql cli earlier:
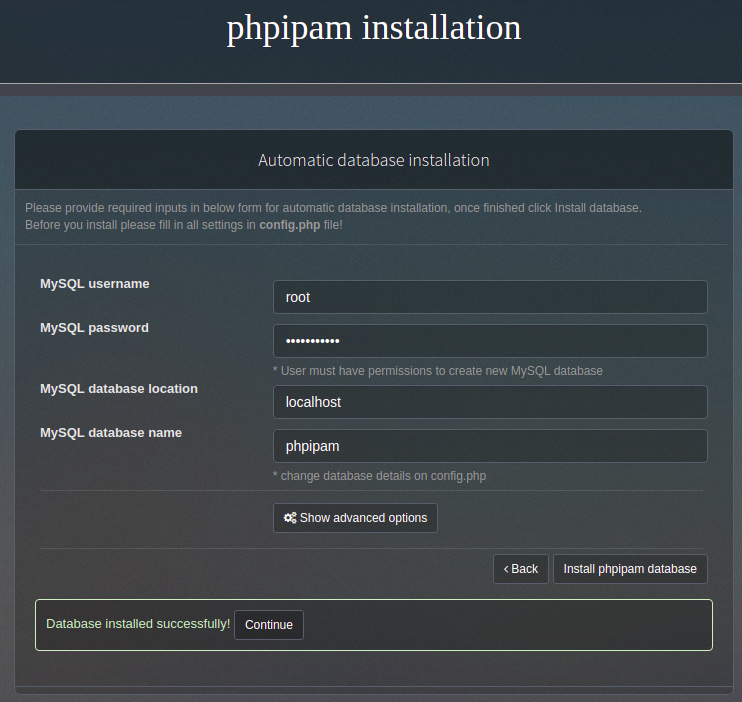
And our database is installed! Now we just need to set the admin password on the next screen:
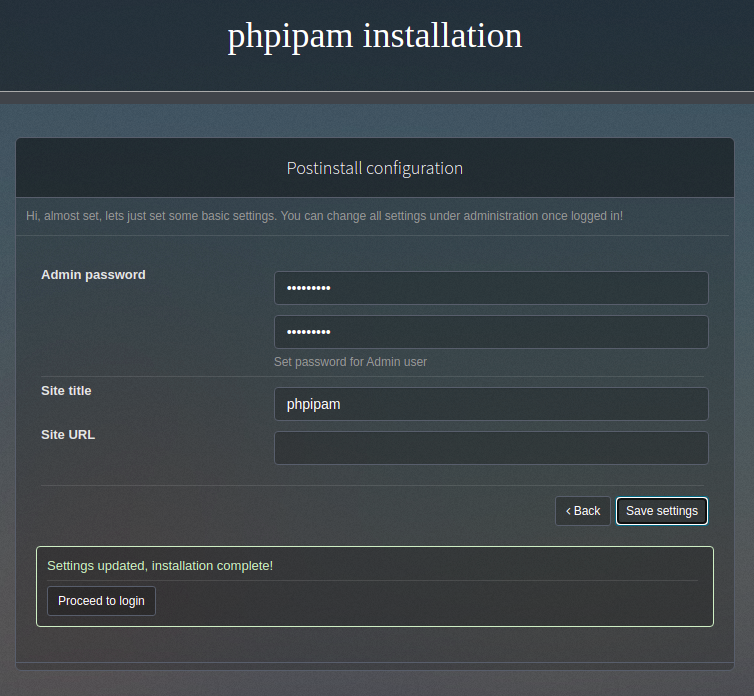
Click on “Proceed to login”, login with user “admin” and the password you just set. You’ll be taken to the main phpipam page!

Hit me up if you run into any snags!